Step 1:
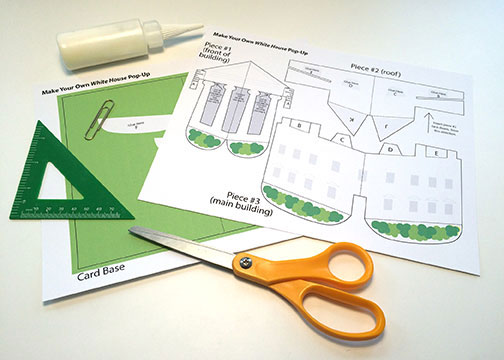
Click on the link to download the .pdf template for the pop-up White House:
Step 2:
Print out both pages from the template onto heavy paper, such as card stock or construction paper.
|
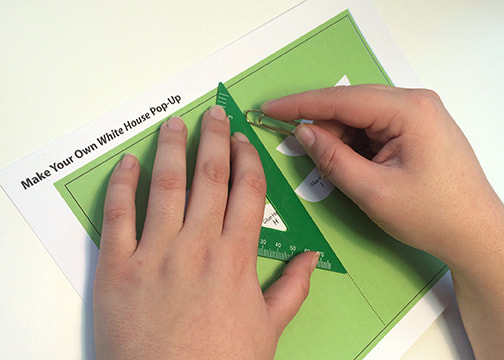
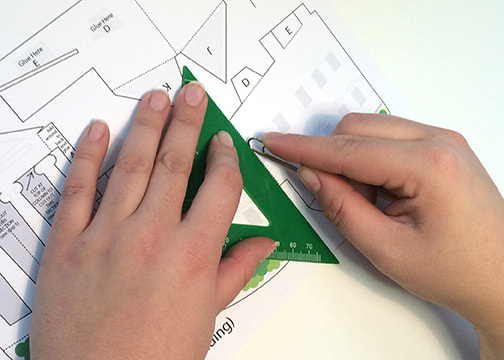
Step 3:With a paper clip (or a ballpoint pen that has run out of ink) and ruler, score all dotted lines by lining the ruler up with the dotted lines and pressing the paper clip back and forth to make a dent in the paper.
|
|
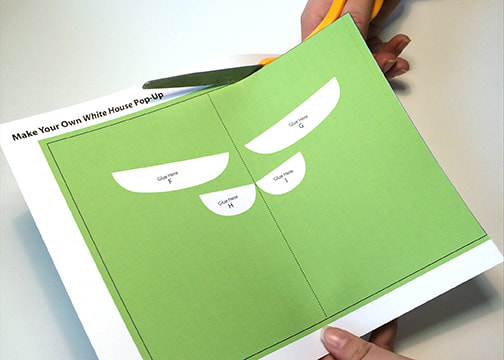
Step 4:If you are going to decorate your pop-up, color in all your pieces BEFORE you cut them out! Cut out the card base by following the OUTSIDE black lines.
|
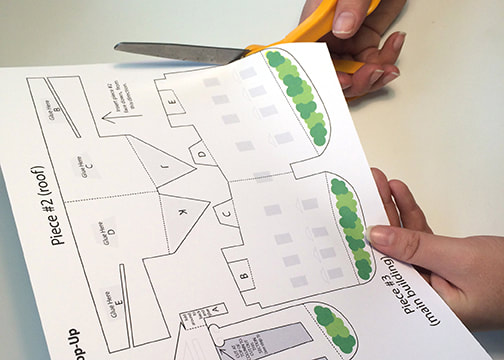
Step 5:Cut out all three pop-up pieces out following the OUTSIDE black lines.
|
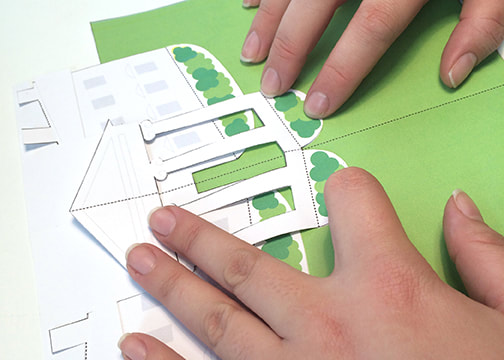
Step 6:To cut out the dark grey section between the columns of piece #1, first fold the piece in half...
|
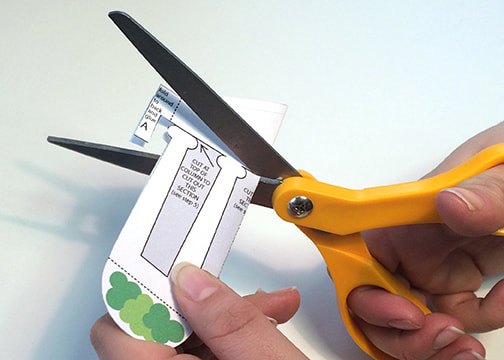
...then cut out the middle dark grey section.
|
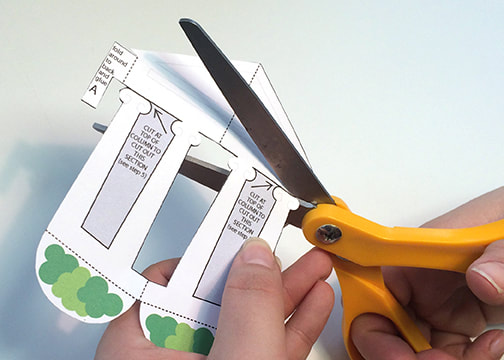
To cut out the two dark grey sections on the sides, cut along the solid at the very top of the outermost columns to get your scissors into the grey area.
|

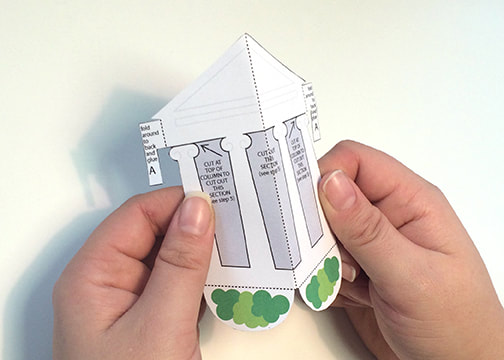
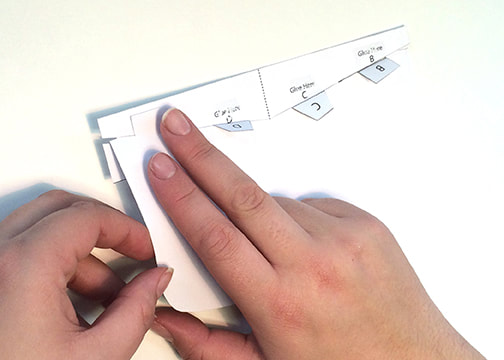
Step 7:To secure the two outermost columns, fold the two tabs marked "A" around to the back of the piece...
|
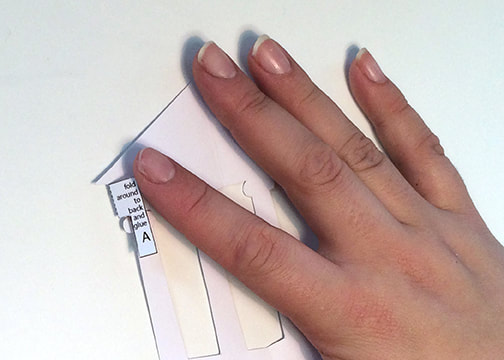
...and glue them flat.
|
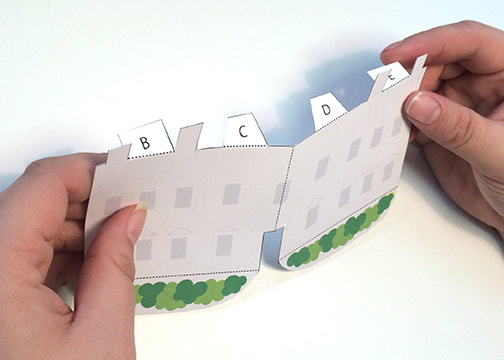
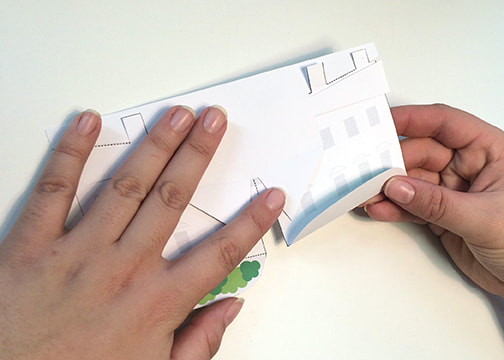
Step 8:Set piece #1 aside for now. Take piece #3 (the big building piece with window) and fold tabs B,C,D, and E back, AWAY from you.
|
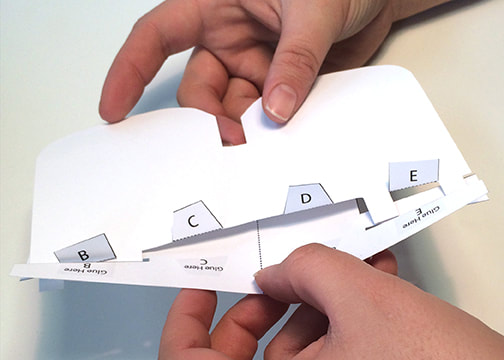
Step 9:Now turn piece FACE DOWN on top of piece #2. Insert the chimneys of piece #3 through the slots on piece #2, but don't let tabs B, or E go through the slots. As you align tabs B,C, D, and E with their corresponding "Glue Here" shapes, make sure to ling up the center fold lines of both pieces with each other.
|
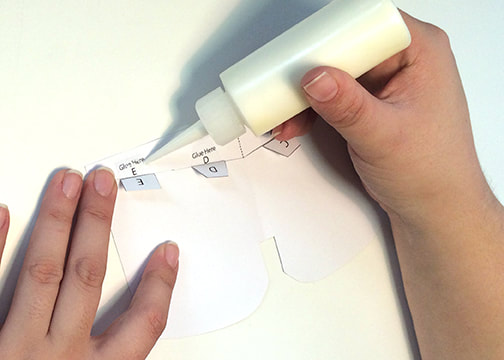
Step 10:Put a small amount of glue on the shapes marked "Glue Here B, C, D, and E.
|
Press tabs B, C, D, and E down firmly and allow the glue time to dry.
|
Step 11:Turn the newly combined pieces #2 and #3 over so that the windows of piece #3 are facing UP. Pre-fold the tabs at the bottom UP, towards you.
|
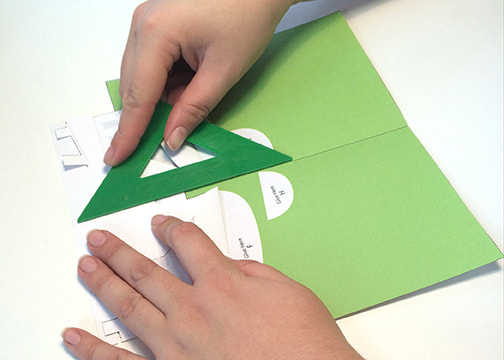
Step 12:Line up the middle folds of piece #2 and #3 with the middle folds of the card base. Make sure the pieces lie flat on the page. Match the tabs of piece #3 with the shapes marked "Glue Here F and G".
|
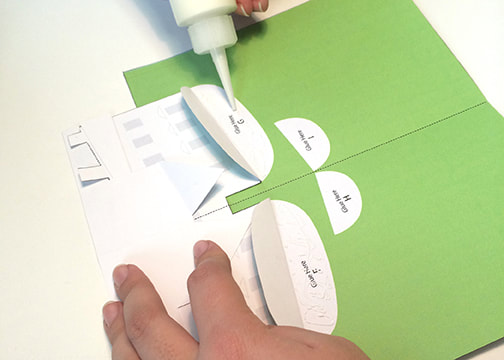
Step 13:On your card base, put a small amount of glue on the shapes marked "Glue Here F and G".
|
Press the tabs down firmly and allow the glue time to dry.
|
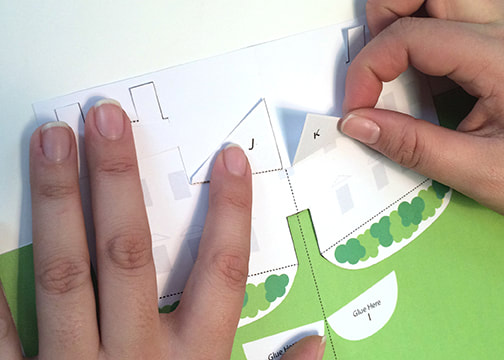
Step 14:Fold the triangular shaped tabs on piece #2 (labeled J and K) UP, towards you (they should now be face up, with the printing facing towards you).
|

Step 15:Take piece #1 and fold the tabs at the bottom UP, towards you.
|
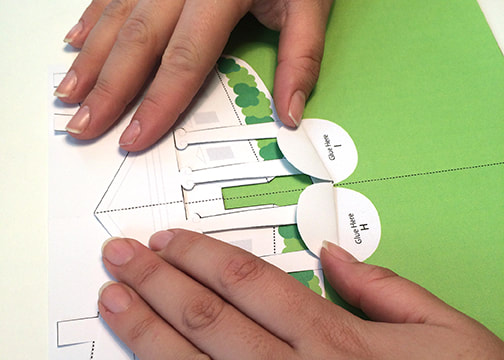
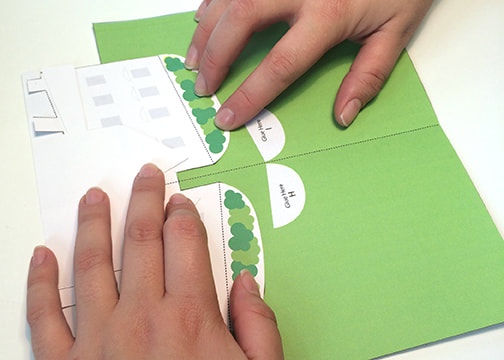
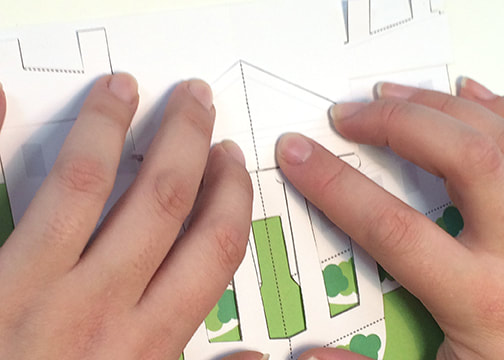
Lay piece #1 on the card base and line the middle fold of the piece up with the middle fold of the card. Make sure the piece lies flat as you line the tabs up with the shapes marked "Glue Here H and I".
|
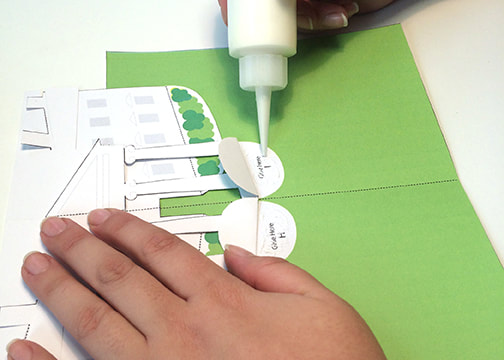
Step 16:On your card base, put a small amount of glue on the shapes marked "Glue Here H and I".
|
Press the tabs down firmly and allow the glue time to dry.
|
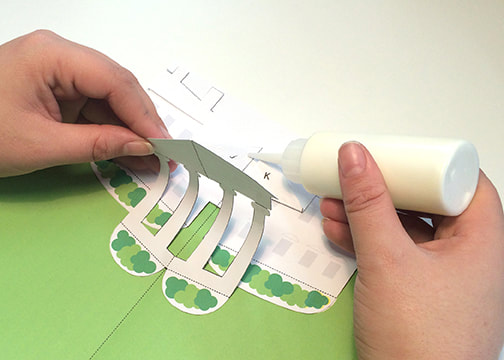
Step 17:Bend the top/point of piece #1 out of your way (but don't fold it) so that you can put a small amount of glue on tabs "J and K".
|
Press the point firmly back down on the tabs and allow the glue time to dry, making sure that the middle folds of all pieces are lined up with the middle fold of the card, and that everything lies flat.
|

Step 18:As you close the card for the first time, you may need to help your pop-up learn how it folds up.
|
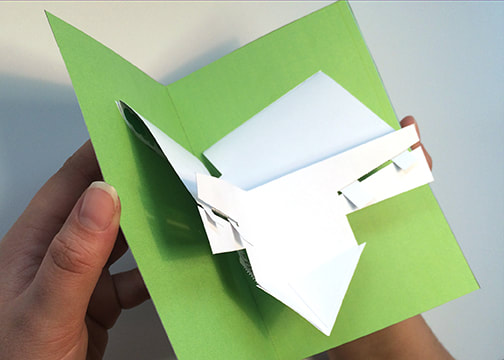
The two building pieces should fold FORWORD and DOWN, while the roof folds inwards in half to match the same angle and direction as the card base.
|
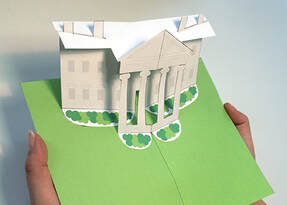
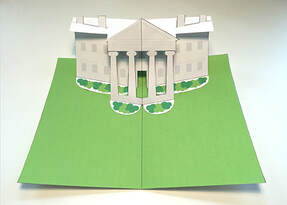
Step 19:Open the card again! Congratulation, your Pop-Up is complete!
|
|
|