Step 1:
Click on the link to download the .pdf template for the pop-up Cake:
Cake Template
Step 2:
Print out both pages from the template onto heavy paper, such as card stock or construction paper.

Step 3:Using ruler as a guide, take the rounded end of a paper clip (or a ballpoint pen that has run out of ink) and press along the dotted line on the center of the card. Go all the way from the top to the bottom of the card!
|
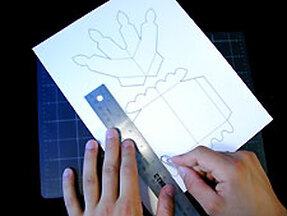
Step 4:Using a ruler as a guide, take the rounded end of a paper clip (or a ballpoint pen that has run out of ink) and press along the dotted lines of all the pop-up pieces.
|

Step 5:Carefully cut out the cake's card following the solid, black lines.
|
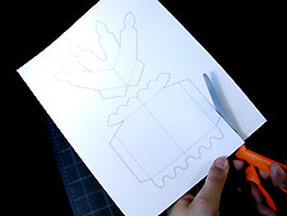
Step 6:Carefully cut out the pop-up pieces for the cake following the solid, black lines.
|
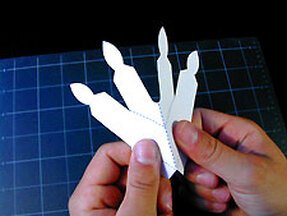
Step 7:Color in the candles (but DON'T color the cake yet!). Take hold of the candle piece and fold the two side away from you along the center dotted line.
|
Step 8:Lay the candles down flat and carefully fold the lower left tab up and crease. Return the tab to its original position.
|

Step 9:Carefully fold the lower right tab up and crease. Return tab to its original position.
|
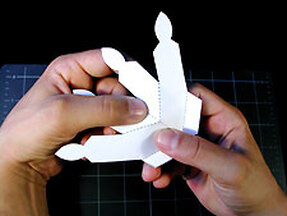
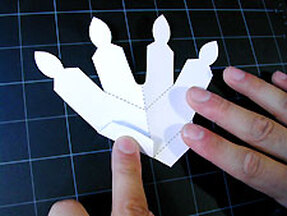
Step 10Pick up the candles and while holding the lower section still with your right hand, fold back the top section with your left.
|

Step 11:Your candle piece should now look like this. The two candles in the center are pushed back away from you while the two candles on the ends are coming towards you.
|
Step 12:Pick up the cake piece and turn it COMPLETELY OVER. You should not be able to see any of the black dotted lines.
|

Step 13:Fold the two side away from you along the center, creased line.
|
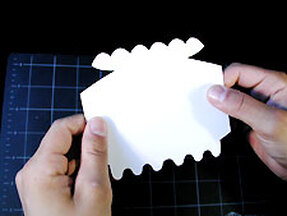
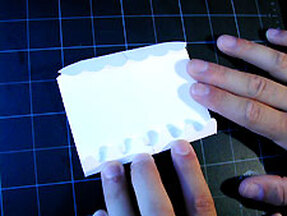
Step 14:Turn the cake piece back over again so you can see the black, dotted lines. Lay the cake down flat and carefully fold the right tab up and crease. Leave the tab in this position.
|
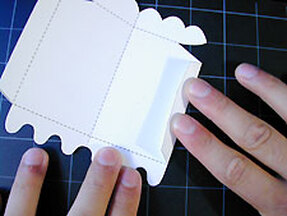
Step 15:Carefully fold the left tab up and crease. Leave the tab in this position.
|
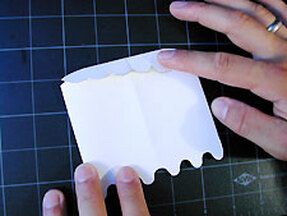
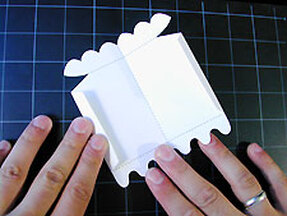
Step 16Take the hold of the "scalloped icing" tab at the top and carefully fold it down and crease. leave the tab in this position.
|
Step 17Take the hold of the "wavy icing" tab at the bottom and carefully fold it down and crease. Leave the tab in this position. Color in the cake and icing!
|

Step 18:Take the card and fold in half along the center.
|
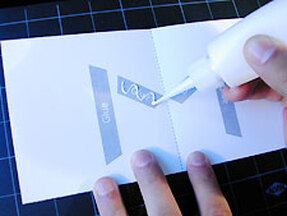
Step 19:Apply the white glue (don't put on too much!) to the left angled area closest to the center of the card...
|
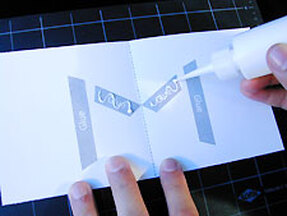
Step 20:...and to the right angled area closest to the center of the card.
|
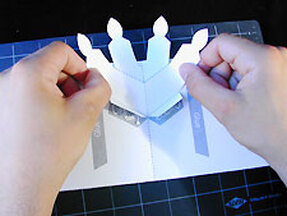
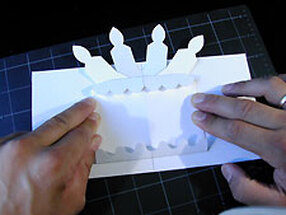
Step 21Carefully line up the tabs on the candles with the wet glue areas on the card. Press the candle's tabs in to the glue. Make sure the center dotted line on the candles matches the center dotted line on the card. Let the glue dry!
|
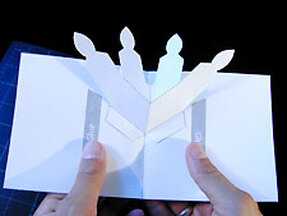
Step 22:After the glue has dried, test the pop-up by slowly and carefully closing the card. You may need to help the candles fold down for this first time.
|
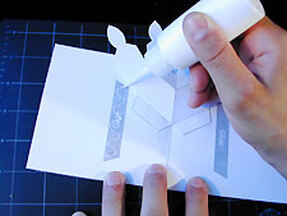
Step 23Apply the glue to the remaining left glue area...
|
Step 24:...and to the right.
|
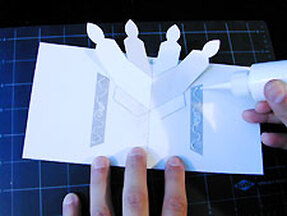
Step 25:Take the cake and carefully line it up with the glue areas on the card. Press the sides into the glue. Make sure the center crease line matches the center dotted line on the card. Let the glue dry!
|
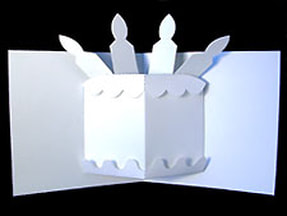
Step 26Your Birthday Cake Pop-up card is finished! Just don't let anyone eat it!
|