Step 1:
Click on the link to download the .pdf template for the pop-up Bee:
Step 2:
Print out both pages from the template onto heavy paper, such as card stock or construction paper.
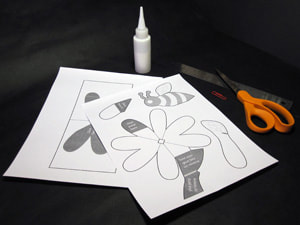
Step 3:It is easier to color in and/or decorate your pop-up pieces before you cut them out! You will need scissors, white glue (such as elmer's), a ruler, a paperclip or ballpoint pen that has run out of ink, and your two print out.
|

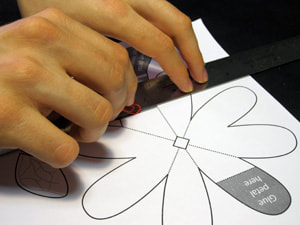
Step 4:Using a ruler as a guide, take the rounded end of a paper clip (or ballpoint pen that has run out of ink) and press along all the dotted lines of pop-up pieces and cards.
|
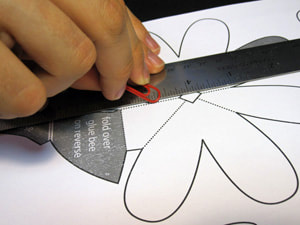
Continue scoring on all the dotted lines for the pieces as well.
|
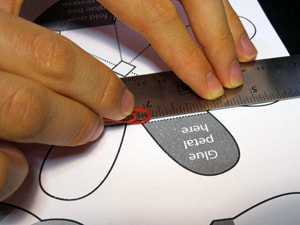
Don't forget score the dotted line underneath the area marked "Glue petal here".
|
Also score above the area marked "fold over glue bee on reverse".
|
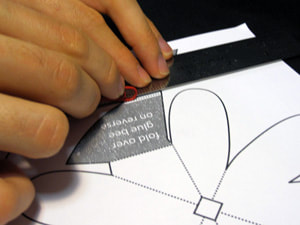
There is also a dotted line hiding above the area marked "Glue petal on reverse".
|
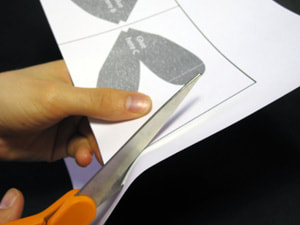
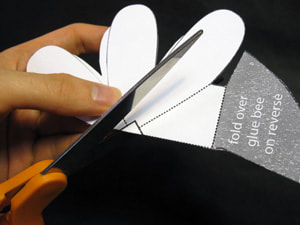
Step 5:Carefully cut out the card along the solid, black lines.
|
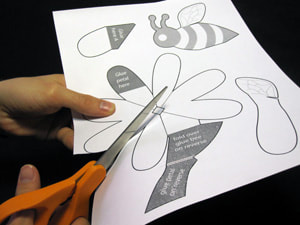
Carefully cut out the pieces along the solid, black lines.
|
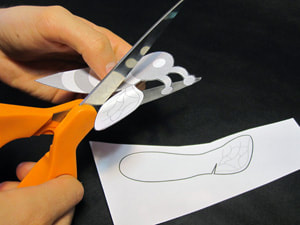
Make sure you cut all the way into the notches for the Bee's wings.
|
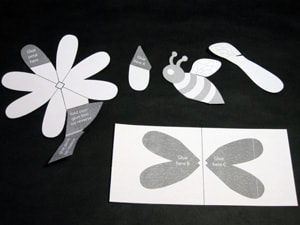
You have 4 pieces and the card.
|
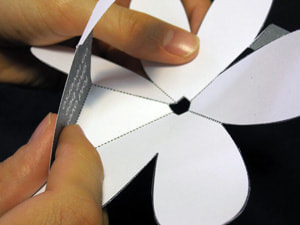
Step 6:Take the flower piece and fold it in half, so the lines are on the outside.
|
Step 7:With your scissors, cut out the hole in the middle of the piece.
|
Unfold the flower again.
|
Step 8:Now fold the flower in half diagonally - inwards, so that the lines are on inside. Unfold.
|
Step 9:Fold it in half on the other diagonal - inwards. Unfold.
|
Step 10:Make sure the flower can collapse correctly - the 2 petals at the top and the bottom should move inwards as the sides of the flower close. Unfold the flower again.
|
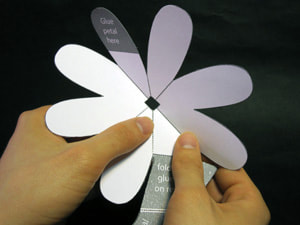
Step 11:Fold the tab on the top petal - marked "Glue petal here" - BACK along the dotted line.
|
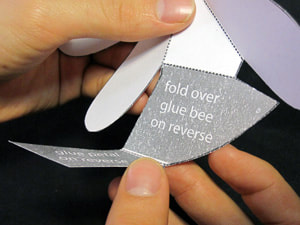
Step 12Fold the tab labeled "Glue petal on reverse" upwards, then unfold.
|
Now begin to fold that entire piece up towards the center of the flower...
|
Step 13:...and leave it in that position.
|
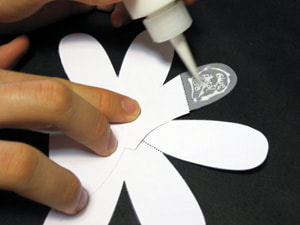
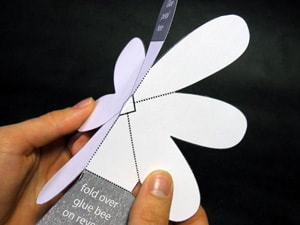
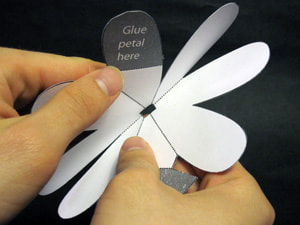
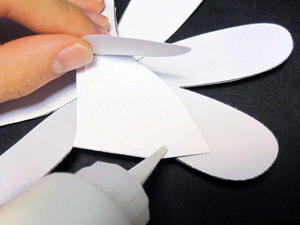
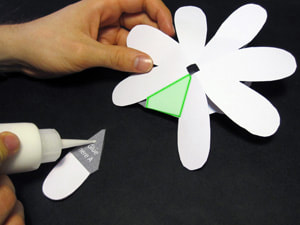
Step 14:Put a small amount of glue on area marked "Glue petal here".
|
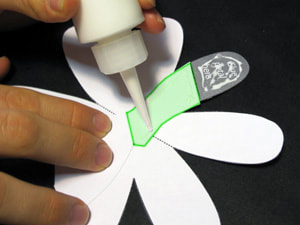
Also apply glue to ONLY the top part of the folded-over tab (green highlighted area above). Do not overlap glue past the fold at the bottom of the green highlighted area.
|
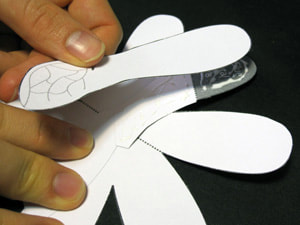
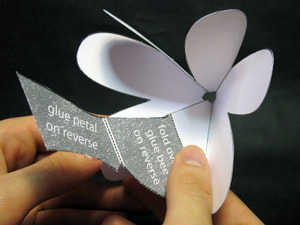
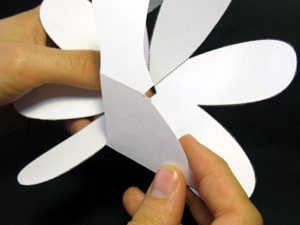
Step 15:Take the petal + wing piece and align it with the glue area.
|
Step 16:Press the piece flat and allow the glue time to dry. Note that the wing which has grey illustration lines on it does not glue down.
|
Step 17:Make sure the petal + wing are free to fold outwards as the flower collapses in on itself.
|
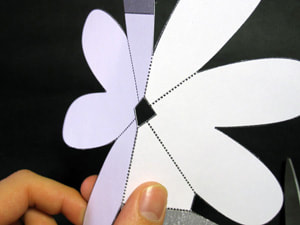
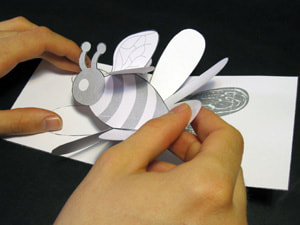
Step 18:Lift up the wing - but don't fold it - and apply a small amount of glue to the area beneath it.
|
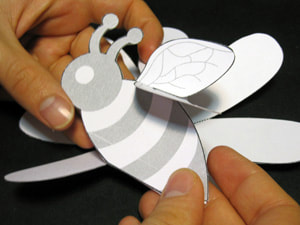
Step 19:Slide the Bee's body piece into position, notching the wings together.
|
Make sure the bee's body lines up with the shape beneath it.
|
Press down firmly, and allow the glue time to dry.
|
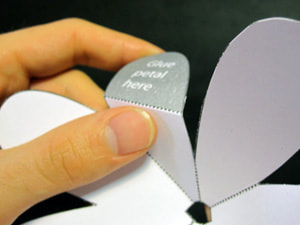
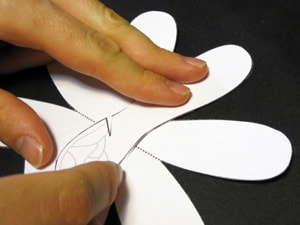
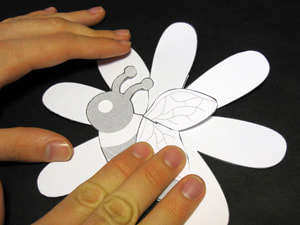
Step 20:Turn the flower and bee over. Please note the area (highlighted green in the picture above) where a petal is missing from the flower. Now find the petal piece marked "Glue here A" and put a small amount of glue in the grey area.
|
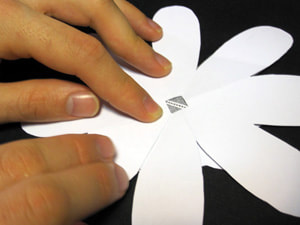
Step 21:Glue the petal piece FACE DOWN in the area highlighted in step 20.
|
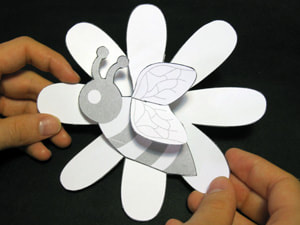
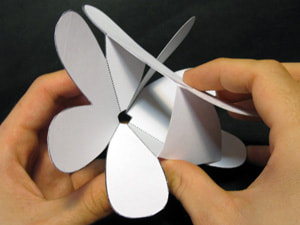
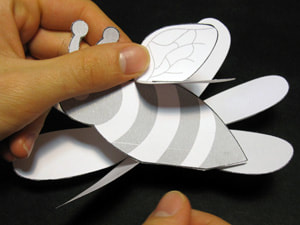
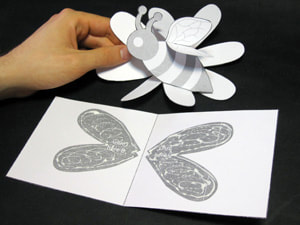
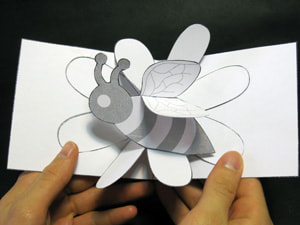
Step 22:Turn the flower over - now all the petals are in place, and the pop-up is ready to glue into the card!
|
Step 23:First, make sure it collapses correctly. Set the flower + bee aside for a moment.
|
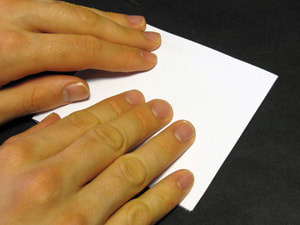
Step 24:Take the card and fold it in half along the dotted line.
|
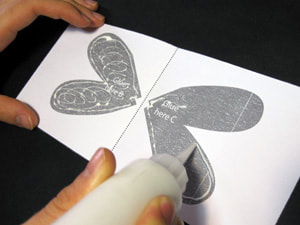
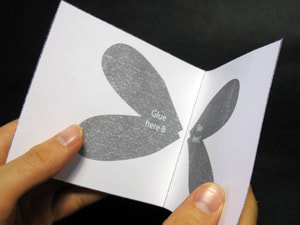
Step 25:Put a small amount of glue in the areas marked "B" and "C" on the card.
|
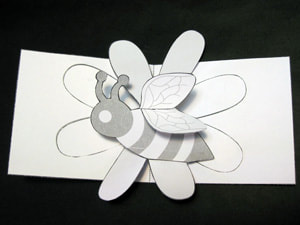
Step 26:Hold the flower + bee upright and get ready to line it up with the areas marked on the card.
|
Match the two petals on the left and right side of the flower up with areas "B" and "C" on the card.
|
Press down firmly and allow time for the glue to dry.
|

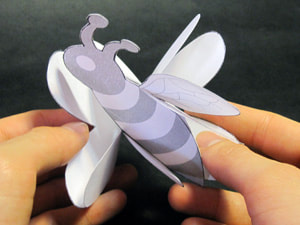
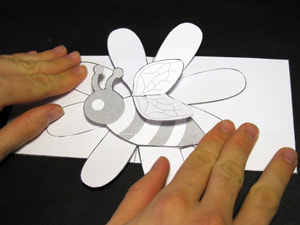
Step 27:Close the card carefully, making sure the bee twists sideways as the card closes.
|
Press down and make sure the card folds flat.
|
Open it back up again - your card is complete!
|
|