Step 1:
Click on the link to download the .pdf template for the pop-up Bird:
Step 2:
Print out both pages from the template onto heavy paper, such as card stock or construction paper.
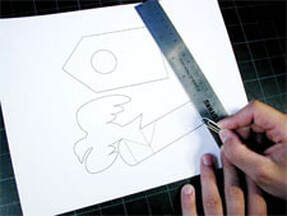
Step 3:Using a ruler as a guide, take the rounded end of a paper clip (or a ballpoint pen that has run out of ink) and press along the dotted lines of the bird house pieces.
|
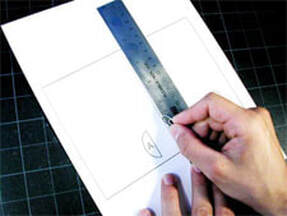
Step 4:Do the same thing along the dotted line of the birdhouse card.
|
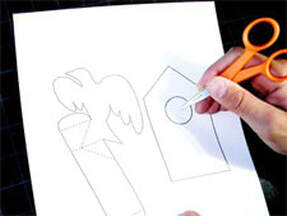
Step 5:Using the pointed end of a pair of scissors (ask an adult for help for with this) poke a hole through the large circle in the center of the bird house.
|

Step 6:Cut the large circle out from the center of the birdhouse.
|
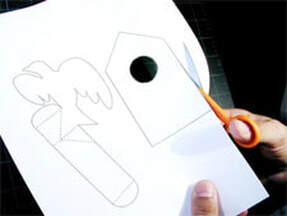
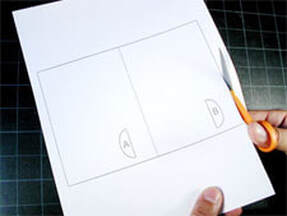
Step 7:Cut the birdhouse out.
|
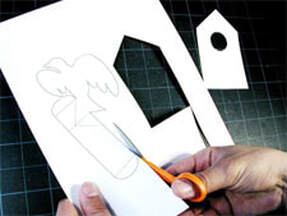
Step 8:Cut the bird out. Be careful when cutting around the wings, and take your time.
|
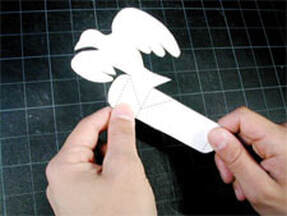
Step 9:Take the bird piece and...
|
Step 10:...flip it completely over so you can't see the dotted lines anymore (we're doing this so the dotted lines won't be so visible in the finished pop-up).
|
Step 11:Grip the bird piece with both hands and fold it back along the center score, right under the bird's tail.
|
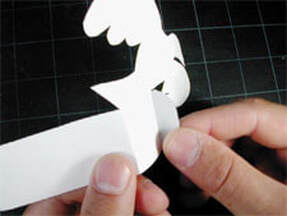
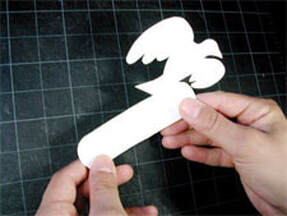
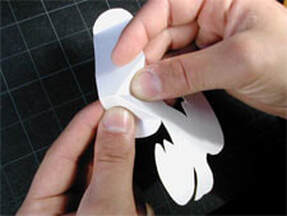
Step 12:Take hold of the small tab at the far right and fold it towards you.
|
Step 13:Take hold of the small tab at the far left and fold it towards you.
|
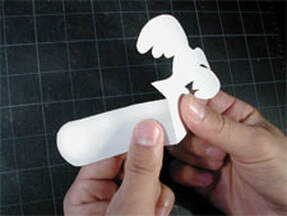
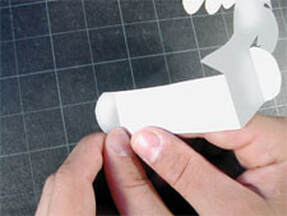
Step 14:Going back to the center fold (right under the bird's tail) begin pushing the bird back away from you.
|
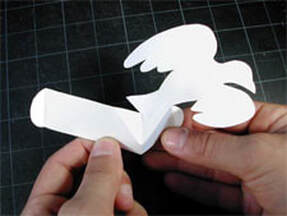
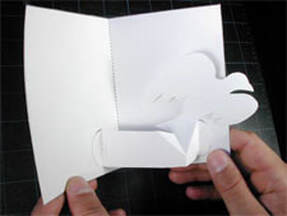
Step 15:The bird piece should now look like this. The tabs are both coming towards you and the bird is pushed back away from you.
|
Step 16:Cut out the card print out.
|
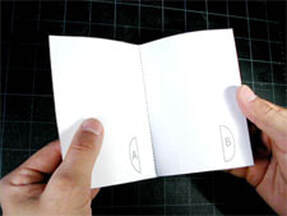
Step 17:Fold it in half along its dotted line, then open it back up again.
|
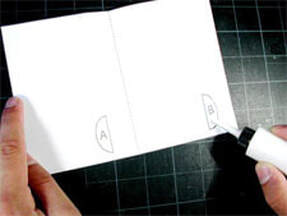
Step 18:Apply glue to the areas marked "A" and "B" on the card. Be careful, you don't need a lot of glue!
|
Step 19:Take the bird piece and line up the tabs at both end with the "A" and "B" on the card.
|

Step 20:Carefully press the bird piece down onto the glue areas "A" and "B". Let dry!
|
Step 21:After the glue has dried begin to slowly close the card. Notice that the birds begins to curve back into the card. If the bird needs a little help curving back into the card use your finger to assist it.
|
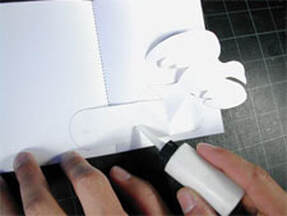
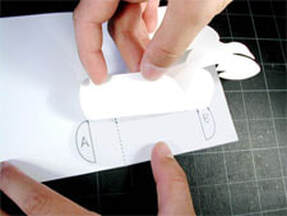
Step 22:Open the card again. Apply glue to the flat area to the left of the bird, making sure you don't get any glue on the bird or its tail!
|
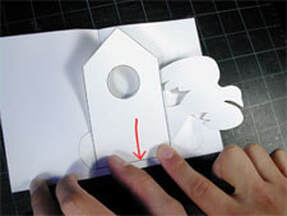
Step 23:Take the bird house piece and carefully line it up with the bottom of the piece you just applied glue to (as shown by the red arrow above). Let the glue dry!
|
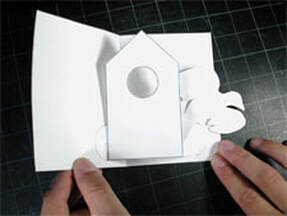
Step 24:Carefully begin to close the card. The bird will go back into its house, When you open the card you can even see the bird's head through the "hole door" before it comes out of the house!
|

Step 25:Color and decorate both the bird and the house!
|
|