Step 1:
Click on the link to download the .pdf template for the pop-up Santa:
Step 2:
Print out both pages from the template onto heavy paper, such as card stock or construction paper.
Step 3
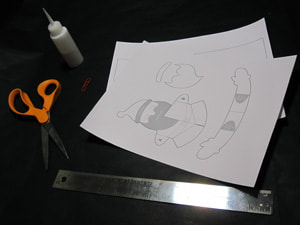
You will need: printed out pages with card and pieces, scissors, white glue (such as elmer's), a ruler and a paper clip or ballpoint pen that has run out of ink.
|
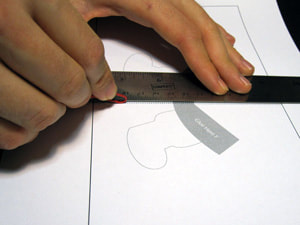
Step 4:
Using a ruler as a guide, take the rounded end of a paper clip (or ballpoint pen that has run out of ink) and press along the dotted lines of the pop-up card...
|
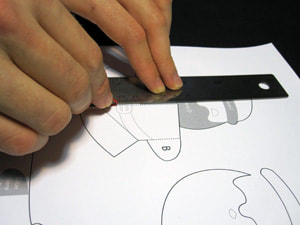
...and pieces.
|
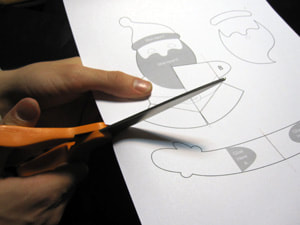
Step 5:
Carefully cut out the pieces and card following the solid, black lines.
|
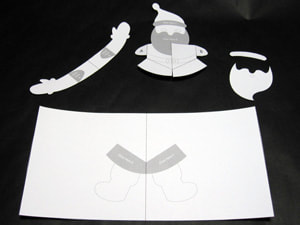
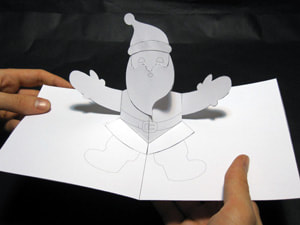
Step 6:When you're done you should have 4 pop-up pieces (Santa's body, arms, beard and hat trim) and 1 card.
|
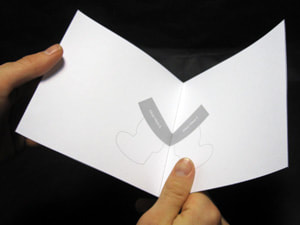
Step 7:Fold the card in half along the dotted lines. Set it aside for now.
|
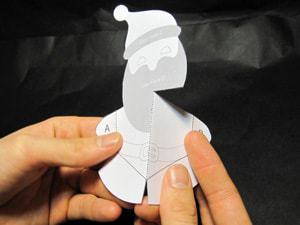
Step 8:Fold Santa's body piece back (in half) along the middle dotted line.
|
Step 9:Fold the tap marked "A" back along the dotted line.
|
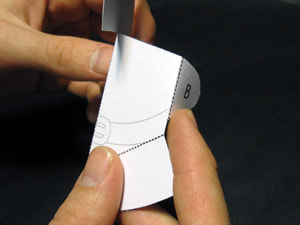
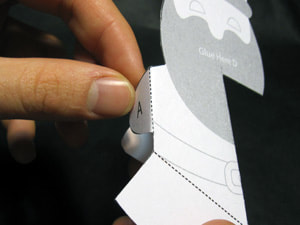
Step 10:Fold the tab marked "B" back along the dotted line.
|
Step 11:Fold the tab on the bottom left of the Santa piece upwards along the angled dotted line.
|
Step 12:Fold the tab on the bottom right of the Santa piece upwards along the angled dotted line.
|

Step 13:Take Santa's arm piece and fold it in half along the dotted line
|
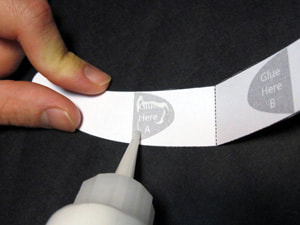
Step 14:Put a small amount of glue on the area marked "Glue Here A".
|
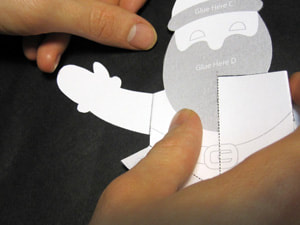
Step 15:Fold tab A from Santa's body BACK and match it to the area marked "Glue Here A". Press firmly, allowing time for the glue to dry.
|
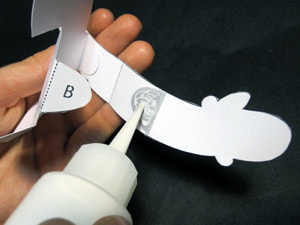
Step 16:Put a small amount of glue on the area marked "Glue Here B".
|
Step 17:Fold tab B from Santa's body BACK and match it to the area marked "Glue Here B". Press firmly, allowing time for the glue to dry.
|
This view shows the arms + body pieces from behind. Note that the middle fold of the arms lines up with the middle fold of the body.
|
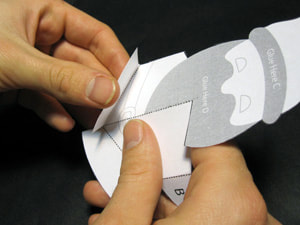
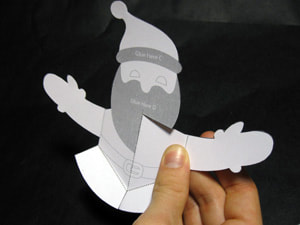
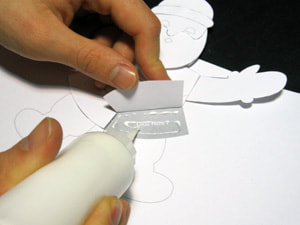
Step 18:Put a small amount of glue to the area marked "Glue Here C".
|
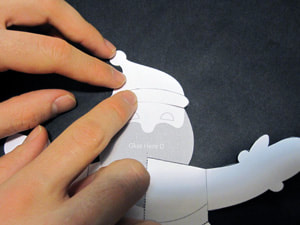
Step 19:Take Santa's hat trim piece and match it to the area marked "Glue Here C". Press firmly and allow time for the glue to dry.
|
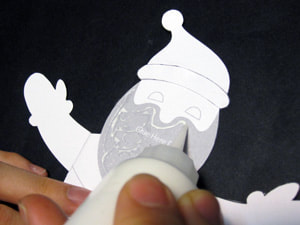
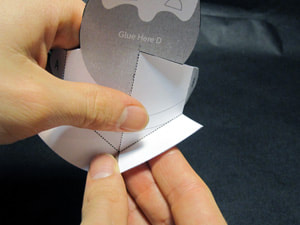
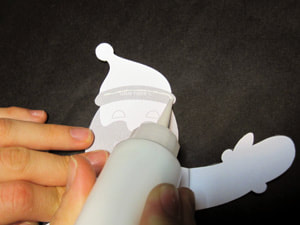
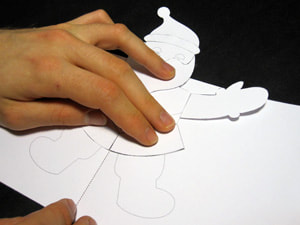
Step 20:Put a small amount of glue on the grey area marked "Glue Here D".
|
Step 21:Take Santa's beard piece and match it to the area marked "Glue Here D". Press firmly and allow time for the glue to dry.
|
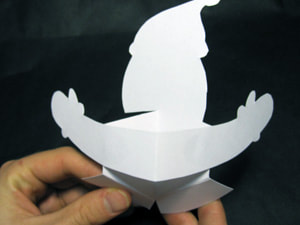
Step 22:Spread a small amount of glue on the area marked " Glue Here E" on the card.
|
Step 23:Carefully match the bottom right tab from Santa's body to the area marked "Glue Here E". Press firmly and allow time for the glue to dry. NOTE: Make sure the middle fold of Santa's body lines up with the middle fold of the card!
|
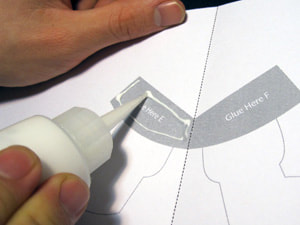
Step 24:Spread a small amount of glue to the area marked "Glue Here F" on the card.
|
Step 25:Carefully match the bottom left tab from Santa's body to the area marked "Glue Here F". Press firmly and allow time for the glue to dry.
|
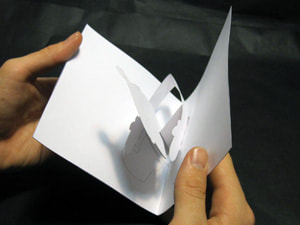
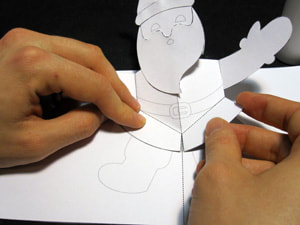
Step 26:Carefully close the card, making sure Santa folds down and forward as the card closes.
|
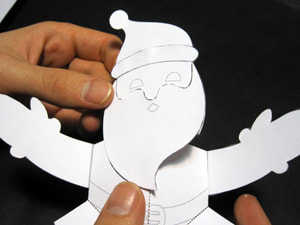
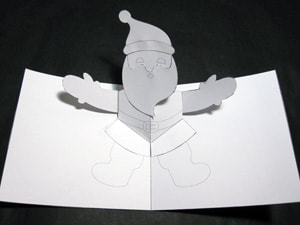
Open your now completed card! Congratulation, you've made a pop-up Santa Claus!
|
|
|
|